This is my first time building a Perfect Grade, and it's a bootleg kit of course.
Anyways, I am still happy that I am able to make a short review for this kit.
I'm expecting lots of parts separation, good articulation and gimmicks. All of these actually appeared and surpassed my expectation. Bandai's engineering is really good (Again, this is Daban Model and I am only referring to Bandai's original design).
So back to the topic, I think this is an old kit from Daban (not sure myself), so plastic quality is bad compared to the new Daban PG's released. This kit isn't mine and I would like to thank my client again for letting me build his PG Strike.
If there are any typos, please do comment. Any errors on terminologies used, please do mention it as well.
I would like to apologize that the pictures/images are blurry because there's a problem with my camera's lenses (I just borrowed it from a friend)
Unboxing:

 |
 |
 |
There are 2 manuals but the other one isn't actually a manual but more of a brochure about the kit, anime series where it appeared perhaps, and other stuff from Gundam SEED.
Regarding the blade for the Grand Slam sword, I’m sure the nub marks will be visible unless you paint it.


There are 26 runners in total and I'm a bit glad they packed 2-3 runners in one plastic bag to avoid scratches.
Although, I still saw some parts with scratches and stress marks probably during shipping. There are no issues on the construction manual and they don't have the funky English translation that you see on TT Hongli's manuals.

I would like to point out that the plastic quality is bad. You could feel that "chalky" or sandy texture each time you cut the nubs. The stress marks appears quickly because of this and hiding them is really hard.
Not sure though if it was entirely due to my hobby knife.If I had a sharper x-acto blade, the result could have been good (or if I learned progressive sanding earlier).
Okay, the next images will be the runners.
Runners:
 |
 |
 |
 |
 |
 |
 |
 |
 |
 |
 |
 |
 |
 |
 |
 |
 |
 |
 |
The Armor Schneider isn't what I thought it would be. I assumed I will assemble it piece by piece like the other versions from the MG line. Instead, you just cut it out from the runner same as the manipulators.
You get some metal parts that will be used on the waist and on the legs.


Beam saber effects are also included although I didn't find any beam saber handles. >_>
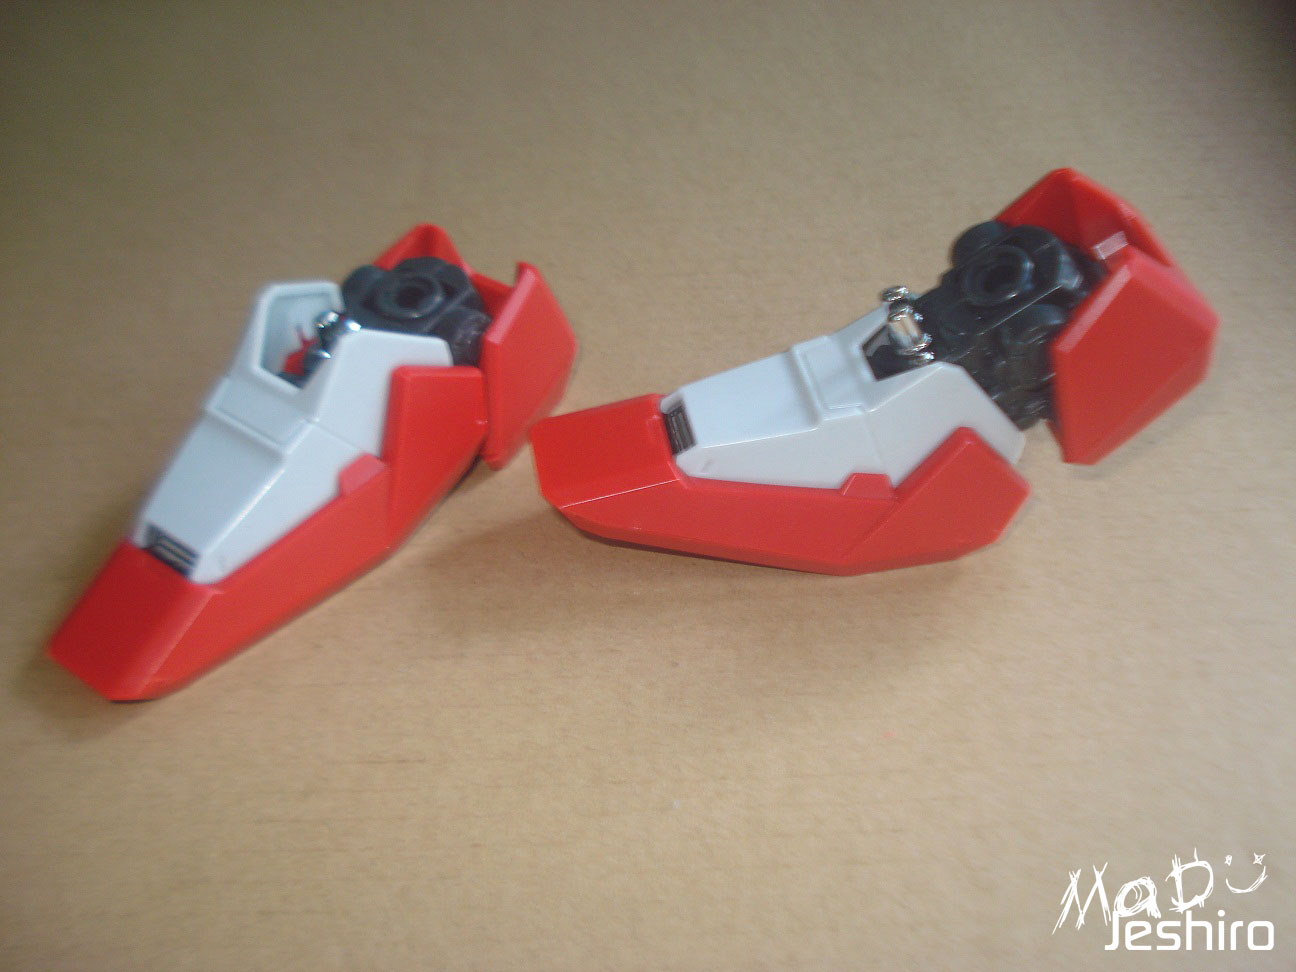
Leg Section:
Part 1:

I had to separate the leg into two because of the large parts. I don't want to risk misplacing any parts if I try to place all the pieces on my table in just one go.
As seen on the construction manual, you get to build from feet to head. While you usually do the opposite in most kits in the MG line.
 |
 |
 |
Parts separation is good here.
No snap fitting issues here during building. Well you can see the size when placed near the X-Acto knife.
Part 2:

Aside from bigger parts, the part separation is really good. The inner frame has some neat cable-like design here and there. The Inner Frame’s mechanism is really amazing. Well it’s only natural since it’s a Perfect Grade kit
I'm a lazy dude so I don't have time to paint them up. And even if do have the time to add some details, I still lack the necessary tools. So I will stick to my usual uniball signo pens for this one.
 |
 |
 |
And I'm done here :)
Several tight parts during assembly but not that much of a big deal.
Overall, there are no major snap fitting issues here and everything (Inner Frame mechanism) works just fine.
I added some minor detailing here using uniball signo metallic green as I said earlier.
Coffee Break :D

My X-Acto blade was already dull so I had to buy a regular small cutter as a substitute.
I was really disappointed at myself I didn’t pursue learning Progressive Sanding at an earlier stage so I had a lot of issues with nub marks. The nub marks are still there when I tried the progressive sanding method Zaku II. But it was said it can’t be helped if the plastic quality is really bad. I am thinking the nubs would be near-gone if the plastic was Bandai. :/
I was really disappointed at myself I didn’t pursue learning Progressive Sanding at an earlier stage so I had a lot of issues with nub marks. The nub marks are still there when I tried the progressive sanding method Zaku II. But it was said it can’t be helped if the plastic quality is really bad. I am thinking the nubs would be near-gone if the plastic was Bandai. :/
Okay so back to the topic, the articulation for the leg unit is more than satisfactory. I really enjoyed moving the legs because of the Inner Frame’s design. :D
The legs can bend this much and I am amazed how each part is linked to the other as you move it, thanks to Bandai.


The gimmick featured here are those armor platings on the side of the legs on the legs. You can pull them out (as seen on image), where the inner frame’s design will be visible. If would be cool if the inner frame is painted.


You can also move those fins behind the legs.
Waist Unit:

Good parts separation even though design is simple
The Strike Gundam’s overall look is really plain and you can tell that to waist’s design. But even with that negative factor, Bandai placed a nice parts separation here.
This is also the section where you will need to use that metal part.


I forgot to add these parts on my exploded/parts separation view.
 |
 |
 |
The front skirts don’t have any issues and articulation is good. There were no snap fitting issues on the front side.

The back skirts however has the issue which came from Bandai ( as mentioned by some of my friends and other builders).
The ball joint of the back skirt tends to pop off from the waist’s sockets. You may need to apply something to keep it in place, but do not glue the whole thing. I used some nail polish on the sockets.
I added some minor detailing here using Uniball Signo metallic green.

This is just my opinion based from what I see in the kit’s design. But I think that the metal parts on the legs and the one used on the waist are meant to hold the unit's size. The metal parts will act as weights and make sure Strike can stand without much difficulty. If the legs were light, there won’t be enough force to pull it down and handle the body’s weight. So, the metal parts in this kit should be checked if missing when you get one.
Body Unit:


The parts separation here on the body is really nice and overwhelming. The detailing for the inner frame is cool that I had expected. All credits goes to Bandai for taking things like these into consideration.
So you get to build 3 parts of body’s inner frame. Here is the middle and I encountered no issues or whatsoever. Pegs aren’t that tight but do not sure force when you feel that it doesn’t fit well. Sand the male pegs or trim the inside rim of the female pegs.

So here is the other part of the body's inner frame. You get to build another for the left side. The detailing and mechanism is really nice. You can see the pistons here, although I'm not sure if they will be visible when the outer armor is put on. Still, it was nicely done by Bandai.

Aside from few tight pegs, everything here is okay. And yeah, you can’t see the pistons attached on the body’s inner frame. There are some gaps where you can see the silvery part of the piston though.


Is it me or the body is a bit bulkier compare to its MG version? :v
I used some Uniball silver on the thruster part.
Arm Unit:

I forgot to add several parts in here and they were still on the runners.

Okay so you get to build separated sections of the arm as you see on the image above. This gives you more range in articulation. My only concern here is that these sections might get loose over time.
I was told that the manipulators/hands are fragile. Take extra caution when trimming the nubs on these parts.
 |
 |
 |
I didn't encounter any snap fitting issues here. Everything fits just fine.
I just hate the nub marks because of my low quality cutter.
Anyways, the arms have very good articulation, thanks and credits again go to Bandai.
Shoulder Armor Unit:

The shoulder armor of the strike is really plain and simple but the parts separation here makes up for it.
Extra gimmicks were also added here to compliment it being a mode of the Perfect Grade line. In here, you can pull the shoulder armor pieces halfway out. It would be nice if you can add some color on the inner frame when you do this gimmick.


The back end of the shoulder can be pulled half-way out. But there’s a very minor issue; these white parts has a tendency to be pulled off completely from the T-like connector/peg (I forgot the code but I think it’s C20/C21). Not much of an issue on my case.

While trimming the nubs on the V-Fin, the part slipped off from my hand. And the cutter slide straight on the side of my left index finger.
More reason that I should’ve learned the progressive sanding method at an earlier stage during this period.
Head Unit:


You will manually place those lead/pins to power up the LED, but it’s not that difficult.
No issues here and everything is good. Just be sure you don’t glue the back piece of the head’s armor you won’t be able to turn on/off the LED.
 |
 |
 |
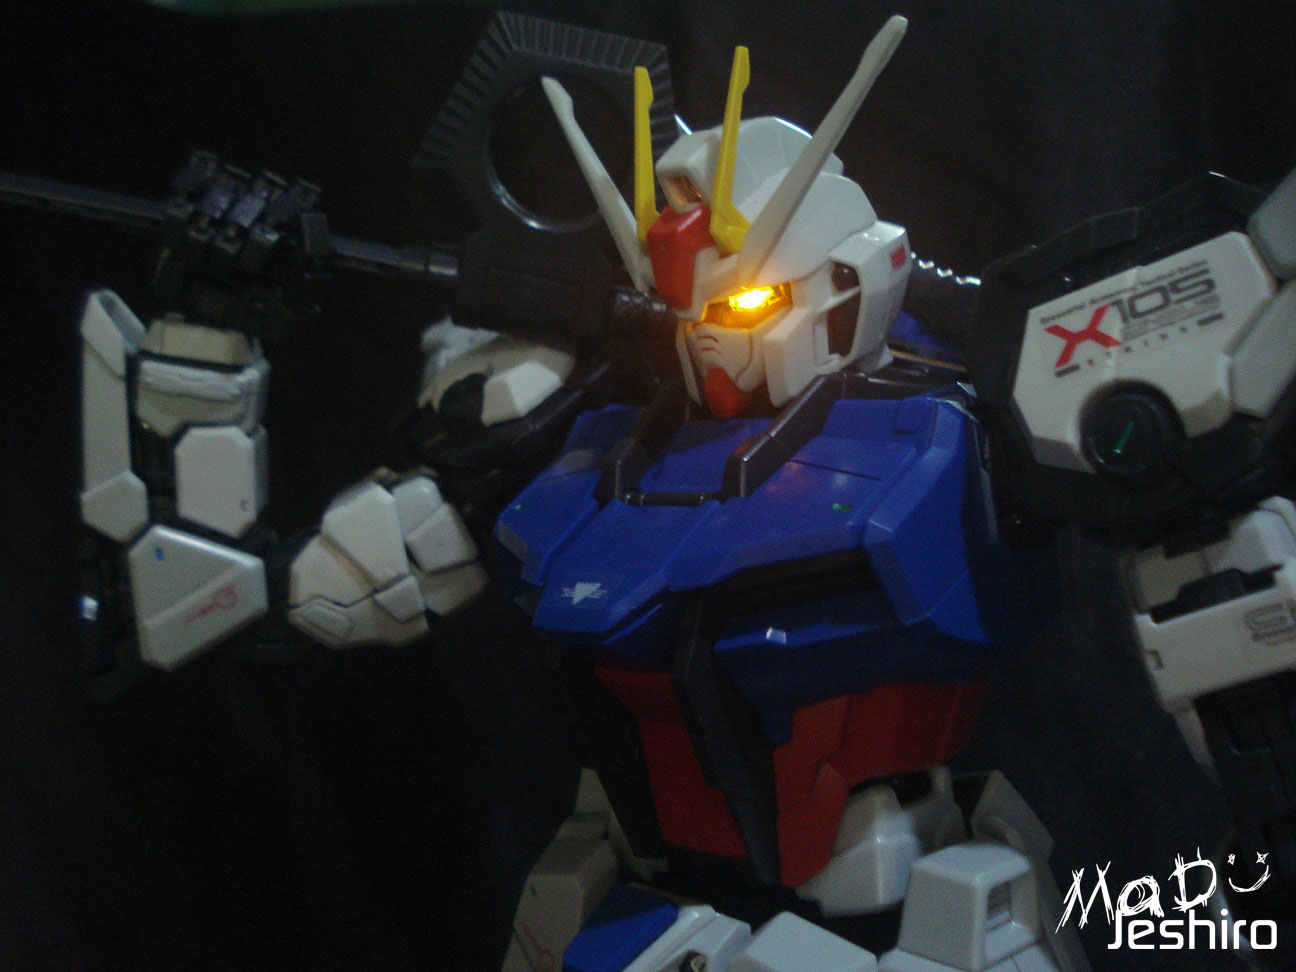
Well it was nice of Daban to place in some button cell to light up the LED. You also get another led (yellow) which is a big help if you will get the PG Strike Freedom. As I recall, the LED's color on PG SF is green.


Here's what the Strike's head looks like when connected to the body.
I haven't cleaned the excess ink on the shoulder. Just ignore it. :v


Beam Rifle:

Very simple parts separation and lots of visible nub marks because of bad plastic quality.

I added some minor detailing here using Uniball Signo silver and metallic green.
Shield:

The shield was huge. lol
Parts separation here is so-so but there were no snap fitting issues which is okay.
The shield features a nice gimmick where you can close that small hole on the middle. Same concept used in soldiers or crowd-control policemen.


Grand Slam Sword/ Armor Schneider:

I was curious and I checked the manual before I started building the Grand Slam sword. And yeah, the Grand Slam sword can be folded :D
No issues here except for the visible nub marks when you cut it off from the runner.
The Armor Schneider doesn’t have any issues aside from the flashes. My concern here is that it was too plain. I think it was better if they have designed it with a white plastic blade and a dark gray handle.

I don’t know any reason what is the possible story behind the PG kits. Bandai decided not to give any waterslide decals in them. But I think it was better if each model comes with a sheet of it. Thinking how detailed the Perfect Grade gunpla models are, I think it was just suited that WSD gives that nice factor when builders try to add more detail instead of the clear sticker.
Anyways, the stickers were not that bad, but not that good either. I will use the sheet because Strike was too plain without it.
Anyways, the stickers were not that bad, but not that good either. I will use the sheet because Strike was too plain without it.


Wow, it was really huge. O_O
At least I get to imagine what the PG Strike Freedom would be like when I placed it on my table.
Strike is a bit heavy as well and I’m not sure if the model has the same weight like MG Ex-S (630 grams I think).
At least I get to imagine what the PG Strike Freedom would be like when I placed it on my table.
Strike is a bit heavy as well and I’m not sure if the model has the same weight like MG Ex-S (630 grams I think).
Weight distribution from body to waist to legs is nice so you can stand him up with ease.

This is my usual routine again. Articulation is really nice and you can see that the legs can be lifted up this far. Even with the shoulder armors attached, the arms can still have that nice range of movement with much problem.
 |
 |
 |
 |
 |
 |
 |
Sorry if some of the pictures were blurry. The upper part of the lens is loose.
So here's my rating for Daban Model's PG Strike
Plastic Quality: 6.5/10
I would say it good, but not that really well. The plastic quality was already bad and my nub-removing skills just made it worse.
Snap Fitting: 7/10
Several tight parts but there were no stress marks during building and I am relieved about it. I could have given it a higher rating if the issue on the back skirt was treated by Daban rather than copying Bandai's error.
Articulation: 9/10
I will not give such a high rating if I didn't experience the actual range the model has. Most of the parts are divided into sections and each section has a certain articulation to boast off, giving Strike good posing range. (Although I will admit I am bad with posing ^^" )
The inner frame mechanism/structure designed by Bandai helped a lot to extend the range of articulation for this model.
Gimmicks: 8/10
Strike Gundam is a simple MS, but because of the PG treatment it can now show off some nice "open-hatch” feats you don't get to see much in the MG line. Paint these visible inner frames when you open up some of these armor plates, and Strike is a good model to display.
Weapons: 7/10
I'm supposed to give a lower number. The strike Gundam doesn't have much weaponry but the kit included a Beam Rifle, a Shield, and a Grand Slam Sword which you don't usually get in both HG and MG. That means you’re just one Aile pack short to make the model look even cooler. ^_^
(I could be wrong with this Grand Slam Sword info so please correct me)
(I could be wrong with this Grand Slam Sword info so please correct me)
Extras: 5/10
You get another button cell battery for the LED and a mini fig of Kira. This fig isn’t the same size you get in Destiny EBM. It’s just a bit larger from the ones you get in MG kits. Lol
It would have been nice if there's an action base/base stand included. But given the info that Strike Gundam is a versatile ground-based unit, I think it was just fair it doesn’t have one.
Also, I hate the clear stickers even if the quality wasn’t bad. I haven’t seen any decals meant for PG’s or maybe I just lack info about it. Still, I hope Bandai starts releasing PG kits with WSD’s.
Overall Rating: 8.5/10
I would have given it a 9 if the back skirts weren't a failure and the plastic quality is the same with the newer models they have released. It can’t be helped though since this was an old mode. :/
But the articulation and other gimmicks really pulled it off – it was remarkably amazing IMHO.
I would recommend this kit for those who would like to paint it. The nub marks will be covered that way. I will admit I haven’t tried upgrading my skills specially in cleaning the nubs, so I’m sure you will do better than me. >_>
But if you have deeper pockets, then go Bandai. The only issue is that loose back skirt right?
I may have missed some info on this review and will try to edit this section from time to time whenever I remember something or discover something.
If you guys have questions or you found any typos, or any wrong information I have used, please do comment it.
I hope this small review have helped you if you want to get Daban’s PG Strike. :)
I hope this small review have helped you if you want to get Daban’s PG Strike. :)

